Starting a deployment
To deploy a model, click the Deploy button in your sandbox.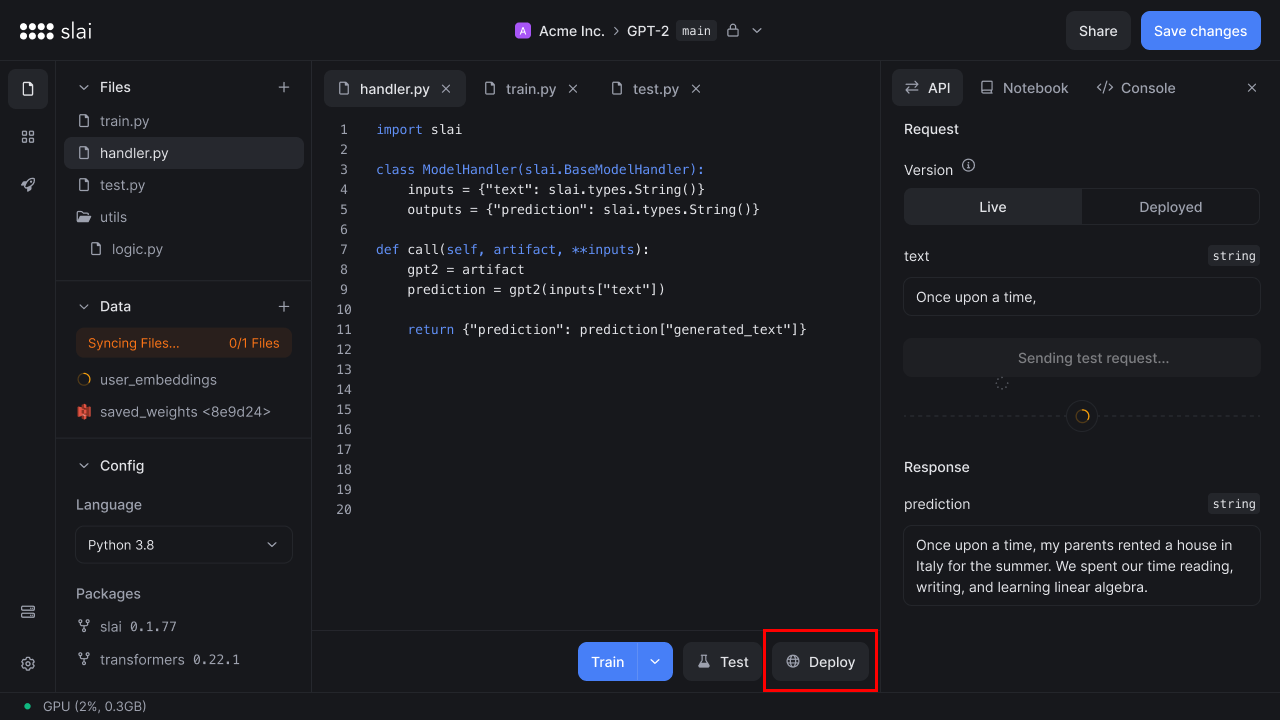
Configuring a deployment
A modal will appear, showing the deployment version. You’ll have the option to configure your deployment by clicking Advanced deployment options. You can find more information on using advanced deployment options here.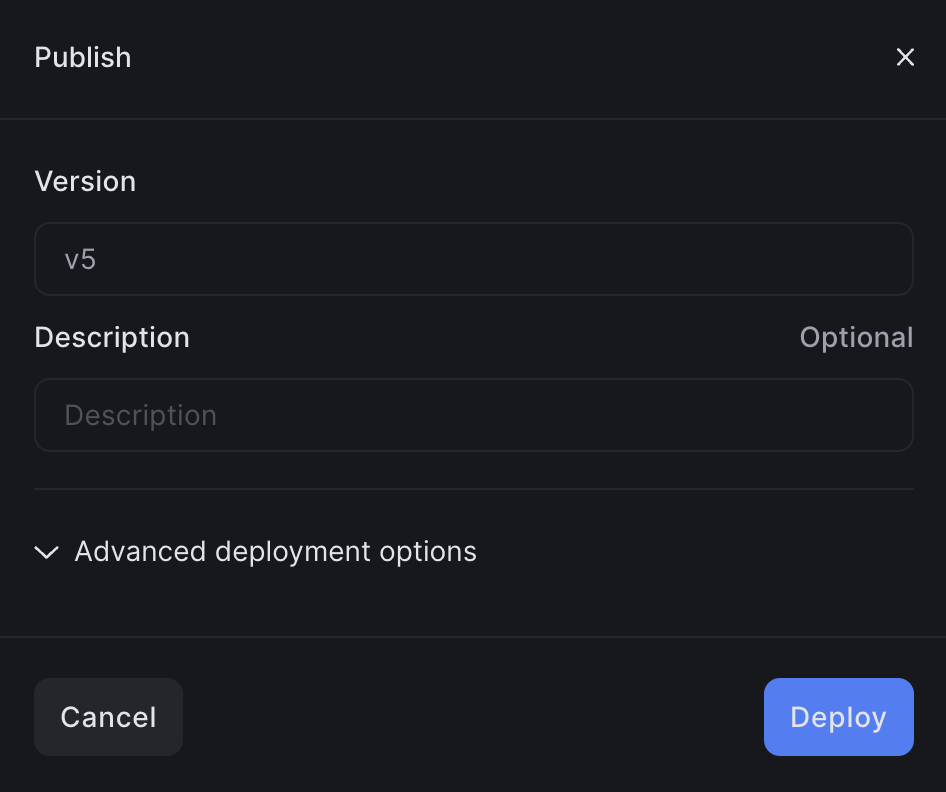
This modal appears after clicking Deploy
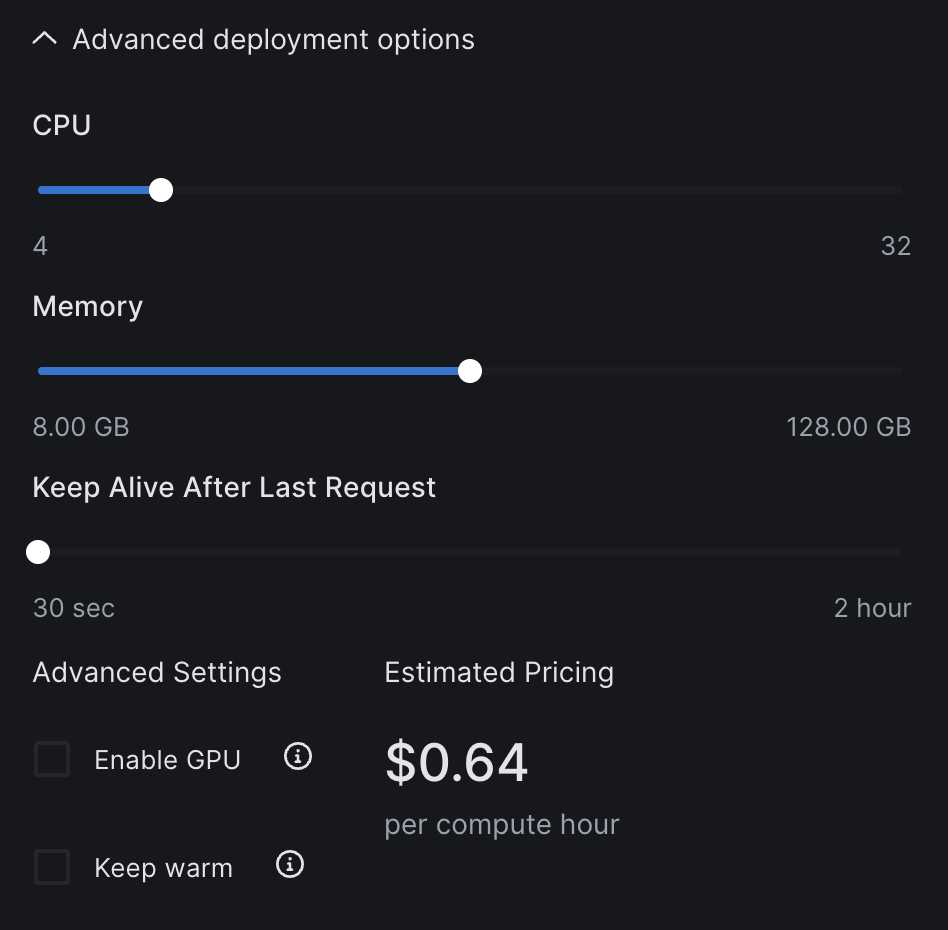
Configure various deployment settings, if you wish
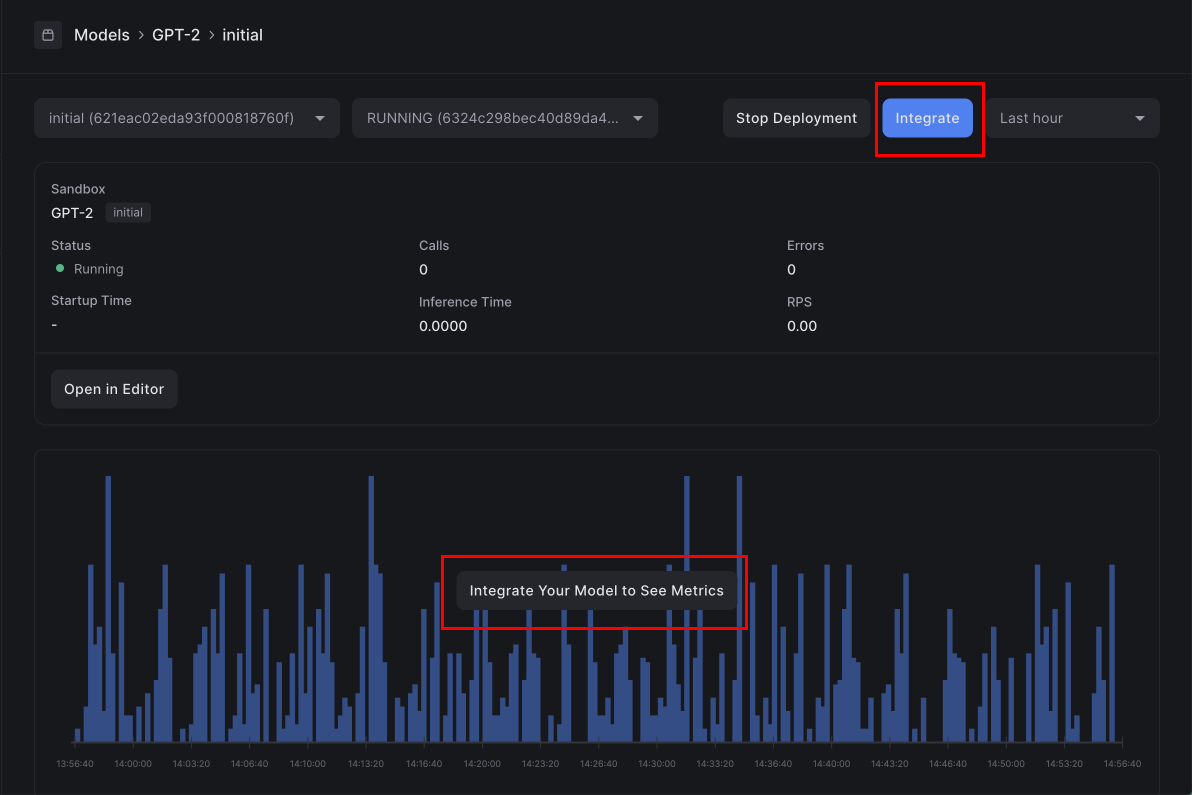
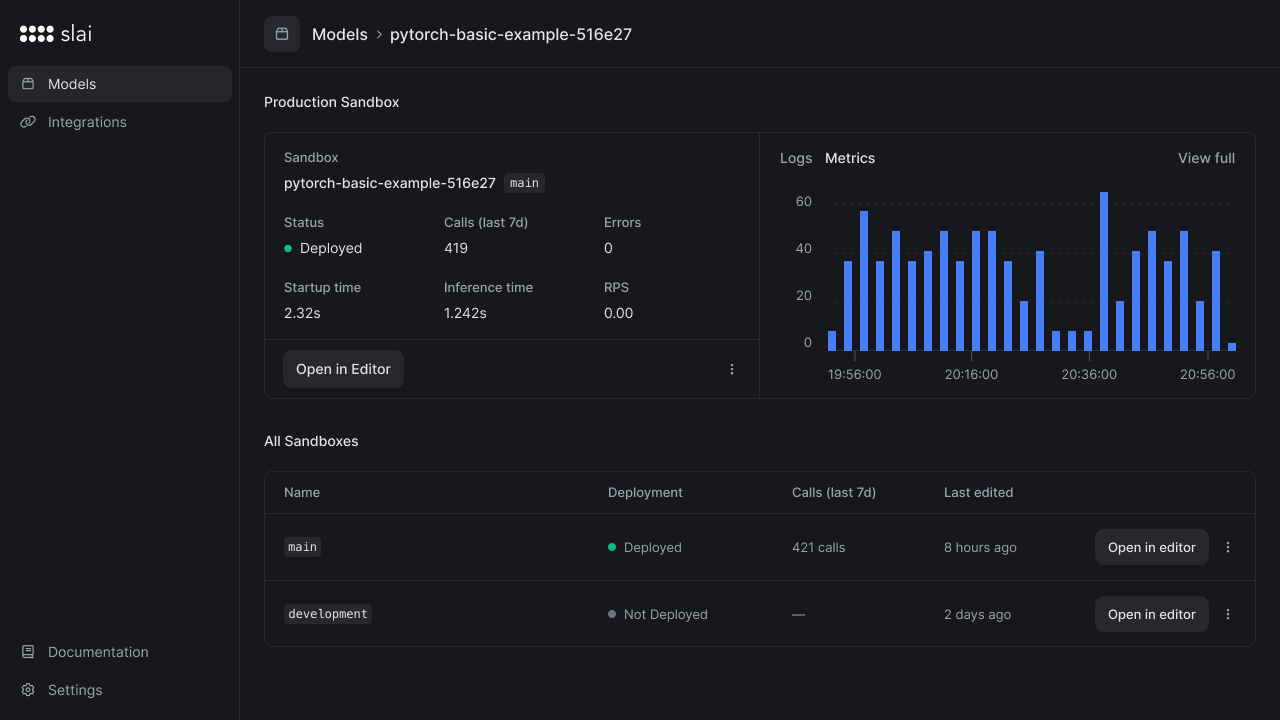
Monitoring a deployment
After deploying, you’ll be redirected to a dashboard to monitor the status of the deployment. On the monitoring page, you can view APM-style metrics:- Total API calls
- Total errors
- Average inference time
- Average cold start time
- Requests per second
- Logs on the container
Container Logs
You can view all console output on your deployed container by scrolling down the page to the Deployment Logs section.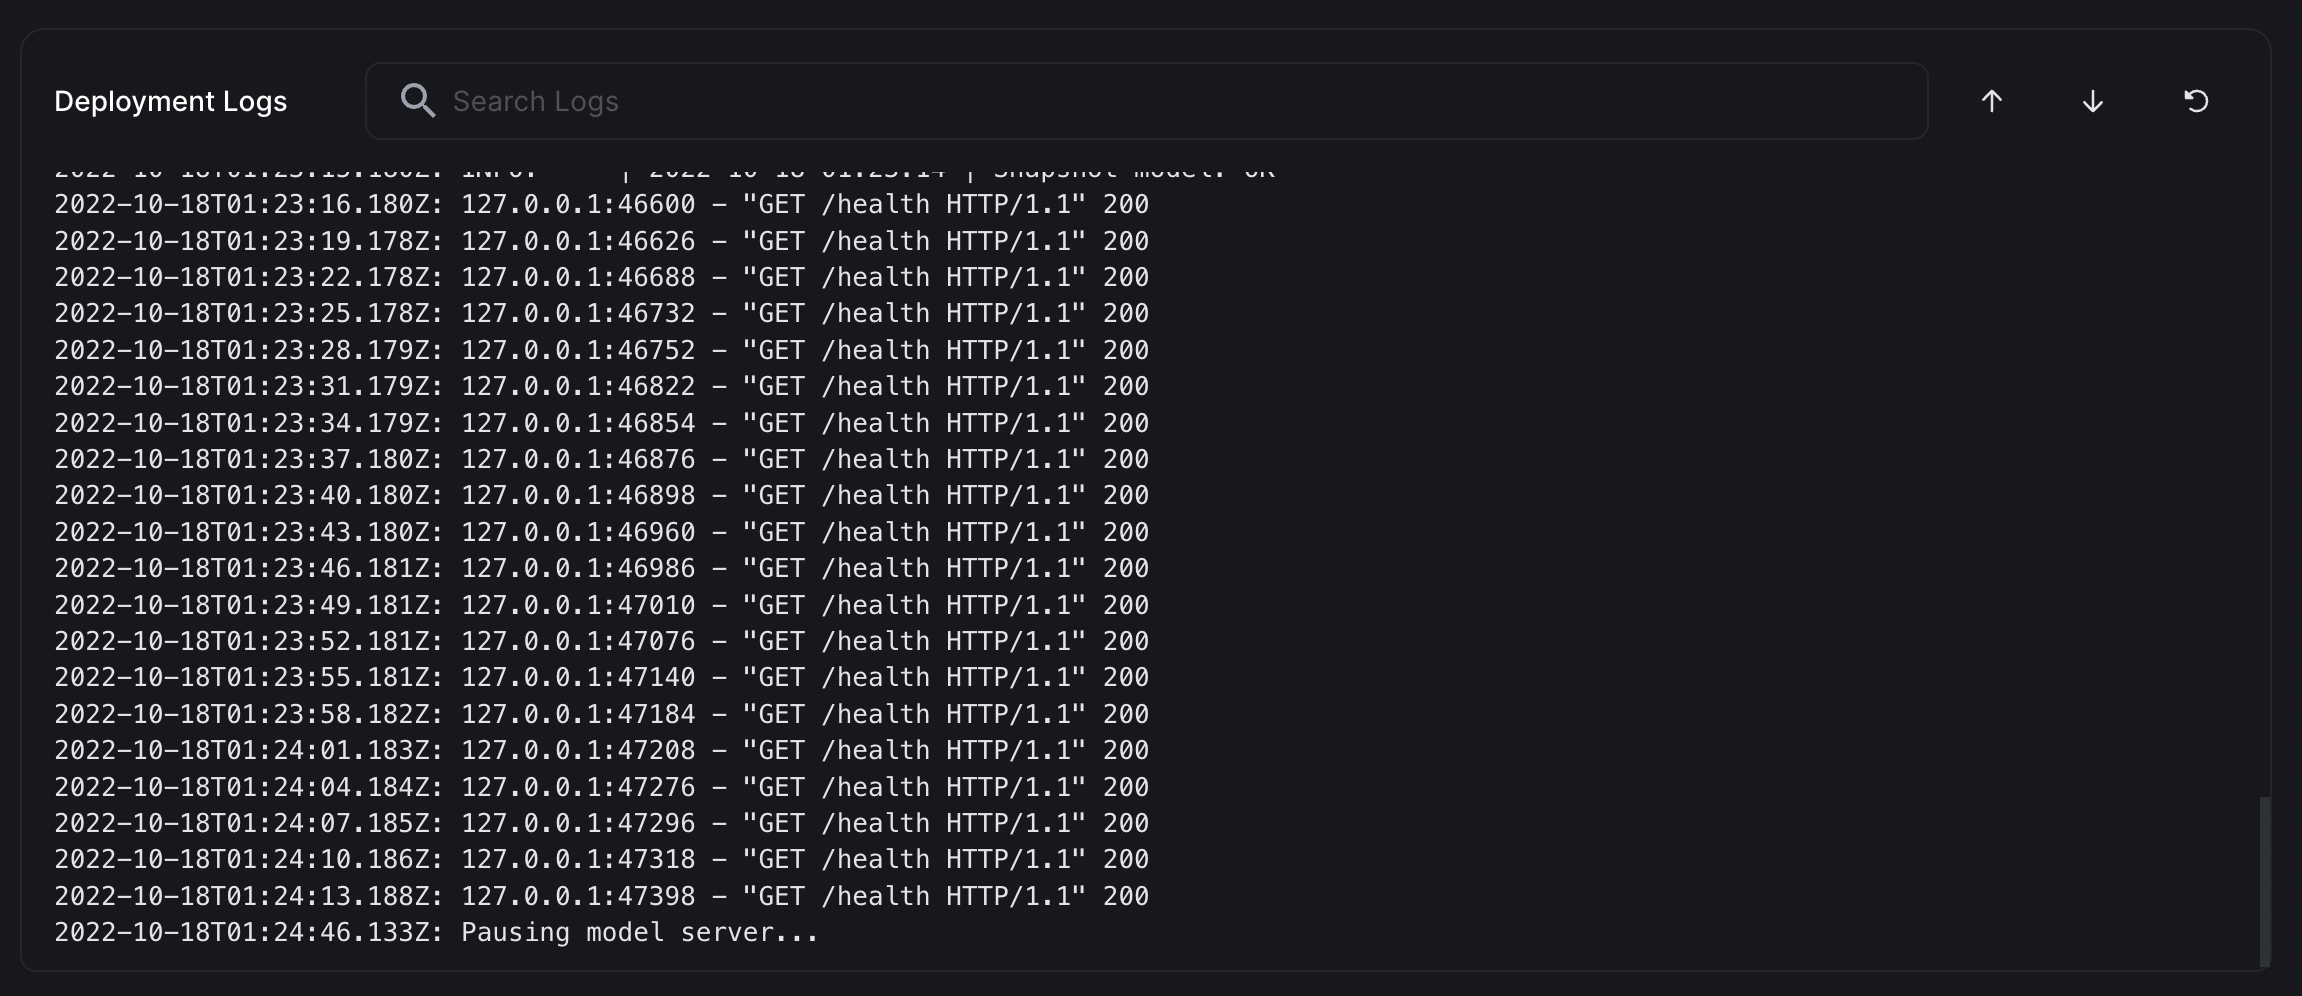
Calling the API
Once the model is deployed, it can be called via our cURL, Python, or Node client. Yourclient_id, client_secret, and model name will be filled in dynamically.
Click the Integrate button to copy the integration code in any of our three client libraries.