Define the environment
The first thing we’ll do is define the environment that our app will run on. For this example, we’re building a Sentiment Analysis model using Huggingface. First, create a file with your Beam App definition. You can name this whatever you want. In this example, we’ll call itapp.py.
app.py
Invoking the Huggingface Model
Now, we’ll write some code to predict the sentiment of a given text prompt. Create a new file. Again, you can name this whatever you want. We’ll name oursinference.py
Our function takes keyword arguments, as (**inputs).
inference.py
Setting a REST API Trigger
To deploy the API, we’ll create a REST API Trigger in ourapp.py.
Our trigger requires three things:
- Inputs - the name and type of all inputs to the API
- Outputs - the name and type of all outputs returned from the API
- Handler - the file and function to be invoked when the API is called
app.py file:
app.py
(Optional) Caching Model on Disk
For performance reasons, you want to store the model on disk rather than downloading it from HuggingFace for each request. Create a Persistent Volume to store the model weights. Add the following lines to yourapp.py:
app.py
app.py file will look like this:
app.py
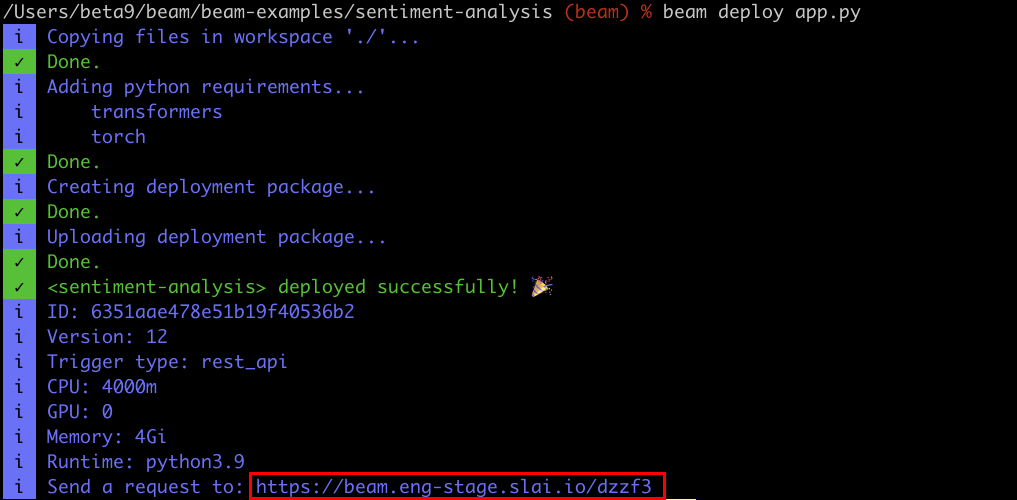
Deploying the app
To deploy the model, enter your terminal andcd to the directory you’re
working on.
Then, run the following:
The requests are authenticated with basic auth. Your username is your ClientID, and password is your Client Secret.